
Do-It-Yourself (DIY) Rolling Storage Bench

The garage is messy and Winter is coming so a storage solution is required. Years of apartment living taught me that tight spaces call for 3 dimensional thinking. Shelving opens up unused real estate. The vertical storage principle holds true in a small garage just as well. Also, why not put wheels on it? This project turned a pile of stuff into a neat stack of stuff. Except for the power tools and time, the cost was less than a store-bought shelf. Plus, a custom job is designed specifically for the space available. There is no prefabricated solution better than what can be imagined by a Stubborn Amateur.
This article outlines the process and construction of the DIY rolling storage bench pictured above.
WARNING: This is an amateur project. I expect that professionals and other stubborn amateurs might approach this project differently. They aren't here and this amateur learns by doing. The article below documents an attempt. If readers try this project, do so at your own risk, take all safety precautions and consult with experienced professionals as needed.
Prerequisite: Access to a well ventilated work area suitable for woodworking projects.
Process
Problem: The garage is messy.
Planning: Measurements, draft a picture, research materials.
Preparation: Go shopping for materials, find or borrow the tool list.
Construction: Build it
Completion: Enjoy!
Glossary
Caster - A caster is a wheel and housing that can be installed on the bottom of large or heavy objects to make them easier to move.
Deck Screws - Deck screws are used for outdoor, all-purpose, wood projects.
Flush - ‘Flush’ is an alignment term used to indicate that two or more objects are right next to each other with a seemingly continuous surface area.
Hand Tighten - Hand-tighten means to secure a fastener with only the strength available by hand and not with the help of a tool.
Midline - A midline is an imaginary line that runs the length of an object, dividing it into two equally sized halves.
Robertson Head - Robertson head screws have a square shaped socket.
SPF Dimensional Lumber - SPF is an acronym referring to Spruce, Pine or Fir construction grade wood.
Wood Screws - Wood screws have a wide thread and a tapered point for use in woodworking projects.
Tools
Carpenter’s Square
Pencil
Measuring Tape
Miter Saw
(2) 36” F Clamps
Drill/Driver
Drill Bit (5/32”)
A #2 Robertson Driver Bit
Materials
TIP: Home building centers provide on-site cutting for small quantities of dimensional lumber.
Part Label Quantity Description
(A) 4 2”x4”x4’10”(58 inches)SPF Dimensional Lumber
(B) 12 2”x4”x1’11”(23 Inches) SPF Dimensional Lumber
(C) 112 #8 Robertson Head 3” Deck Screws
(D) 4 2”x4”x2’8”(32 Inches) SPF Dimensional Lumber
(E) 4 2”Casters
(F) 5 1”x6”x5’ Fence Boards
(G) 5 1”x6”x4’10” Fence Boards
Assembly:


1) On a flat surface, arrange two (A) boards about two feet apart. Stand them on their narrow (1½”) faces.
2) Carefully lay out six (B) boards between and perpendicular to the (A) boards. Turn upwards the narrow (1½”) faces of all (B) boards. Position the two outermost (B) boards so that their outward turned long faces are aligned parallel and flush with the small end faces of the (A) boards. Evenly space the remaining (B) boards so that the gaps between are not greater than 10 inches.

3) Using the carpenter’s square, check that all boards are seated at 90 degree angles.


4) Open both clamps wider than twenty four inches. Without disrupting the alignment of the project, gently place the clamps so that the upper jaws contact one of the (A) boards and the lower jaws loosely contact the opposite (A) board. Carefully position one clamp at each end of the project between the first and third (B) boards. Reposition the clamps to ensure that the jaws are not directly in-line with any (B) boards. Hand-tighten each clamp to hold the project in place.
NOTE: I did not have F clamps large enough for this project. So with some wood scrap and extra screws I made the clamp-extending jig pictured above. I could have halted the project to go out and purchase bigger clamps but in the Stubborn Amateur spirit I found a solution with the materials available.
WARNING: Wear eye protection when operating a power tool. Follow all safety instructions listed in the power tool’s manual.


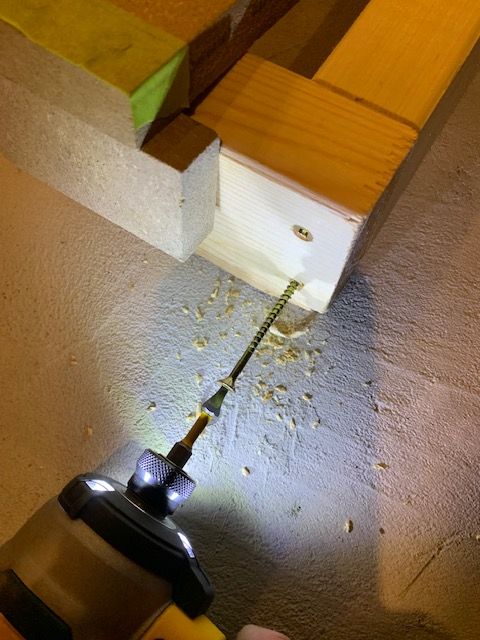
5) Using the drill and a 5/32” bit, carefully drill two pilot holes through the horizontal midline of the (A) board and into the end of all six perpendicularly seated (B) boards.
6) Using the #2 Robertson driver bit and drill, drive twelve 3” deck screws into the pilot holes along both (A) boards.
7) Repeat steps 6 and 7 on the opposite side of the workpiece.
8) Release the clamps.
9) Repeat 1-8 to construct a second rectangular workpiece.


10) Choose one of the rectangular workpieces. Vertically stand one (D) board on its smallest face and hold it next to the corner of the workpiece. Arrange the short (1½”) side of the (D) board to be flush with the outward facing long side of the (A) board next to it. The 3½” side of the (D) board should be parallel with the (B) board next to it. Use the carpenters square to ensure all angles are 90 degrees. Hand-tighten a clamp around the base of the vertically standing (D) board and the (B) board next to it. Ensure the midline of the (D) board is not covered by the clamp jaws.
11) Using the drill and a 5/32” bit, carefully drill 2 pilot holes at about 1½” and 3 ½” above the work surface, through the midline of the vertically standing (D) board and into the end face of the (A) board behind. Using the #2 Robertson driver bit and drill, drive 3” deck screws into the pilot holes. Release the clamp.
12) Repeat steps 10-11 to vertically fasten three more (D) boards at all four corners of the workpiece.
CAUTION: Heavy lifting can cause injury. Use correct lifting posture when repositioning a large workpiece. If possible, get help from a second person.

13) Turn over the project so that all four of the vertically standing (D) boards are supporting the rectangular workpiece.

14) Slide the remaining rectangular workpiece on the work surface between the vertically standing (D) Boards.
15) Repeat steps 10-12 to fasten the four ends of the (D) board to the lower rectangular workpiece.

16) Center one caster upside down on the corner of the workpiece above the joined (A), (B) and (D) boards. Use the pencil (or Sharpie) to mark the workpiece through the screw holes in the caster housing. Repeat with the other casters at the remaining corners of the workpiece.
17) Using the drill and a 5/32” bit, carefully drill four pilot holes at the marked locations at one corner of the workpiece. Repeat at the remaining three corners.

18) Using the #2 Robertson driver bit and drill, fasten the casters to the work piece by driving four deck screws through the screw holes in the caster housing and into the pilot holes. Repeat at the remaining 3 corners of the workpiece.
NOTE: Each of the 2 inch casters are rated to hold 125 lbs. Factor in the weight of the framing at about 100 lbs. the storage bench should have about a 400 lbs. weight limit.
CAUTION: Heavy lifting can cause injury. Use correct lifting posture when repositioning a large workpiece. If possible get help from a second person.

19) Carefully flip the workpiece so that the casters contact the floor.

20) Place the 5 (F) boards onto the top of the workpiece. Using the drill and a 5/32” drill bit, carefully drill two, evenly spaced, pilot holes through every (F) board into the (B) board below. Using the #2 Robertson driver bit and drill, install deck screws in every pilot hole. Repeat for the opposite side.
NOTE: ¾” plywood would be better for the shelf surfaces of this project. In the case, I had spare fence boards available and decided that they would be sufficiently supported by the framing of this project.

21) Place the five (G) boards on the lower shelf of the project. Using the drill and a 5/32” drill bit, carefully drill two, evenly spaced, pilot holes through the (G) board into the (B) board below. Using the #2 Robertson driver and drill, install two deck screws in every pilot hole. Repeat for the opposite ends of the (G) boards.


22) Enjoy!