
Dog Bandana
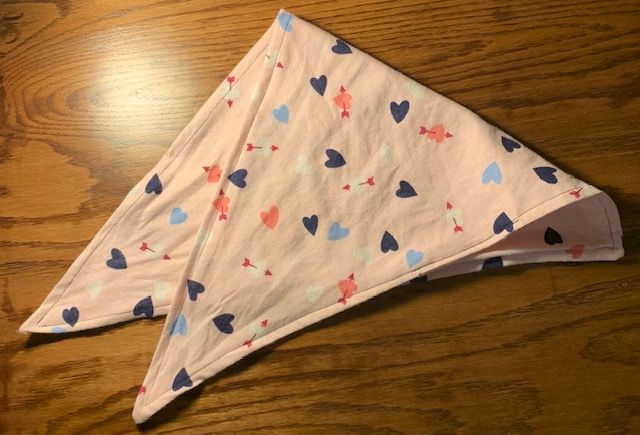
On the day that my wife and I got a young dog she suggested that we purchase a cute bandana. Like so many projects, my first instinct was to make one from scratch. I believe a bandana is one of the easiest sewing projects for a beginner. Spoiler alert, it is easy. With the right tools we can have a bandana for any season. It’s January at the moment so we went with a Valentine’s Day pattern.
I used a Janome HD-5000 for this project. The ‘HD’ stands for ‘heavy duty’. This is the first sewing machine I have ever owned and I am very impressed. The construction is solid and the motor has had no trouble with several layers of denim, canvas and webbing. I am especially fond of the stitch selection mechanism which has been very helpful for this beginner. I will write a full review of the Janome 5000 after I attempt a few more projects.
Full disclosure, I am a complete beginner at sewing. I remember sewing a pillowcase in elementary school. My mother and grandparents had sewing machines but I was never very interested. As I get older I have recognized the value of some basic sewing skills. It is important to be able to repair minor damage to clothing and fabrics. We have had this machine in the house for just a few weeks and I have mended winter gloves, work jeans, and a dog blanket for the car. I have some ambitious projects for the future but need to master the basics. A few dog bandanas are a great project to level up my sewing ability.
The Project
Valentine's Day Dog Bandana

Materials


Cotton Fabric
Measuring Tape
Scissors
Sewing Pins
Sewing Machine
Thread
Snap Button Kit
Procedure

1) Use the measuring tape to measure a square of fabric. I used a 22" square for this project. In the end, 22" was a too big for our 50 lbs. dog. The next bandana will be 19"-20."
2) Use the scissors to cut a straight line in the fabric to make a 22"x22" square.

3) Fold the fabric into a triangle with the printed side in the middle.
Caution:
Fabric pins can puncture your finger tips. Use a thimble to protect your fingers when pinning fabric together. Have first aid supplies near by in case of injuries.

4) Keeping the fabric perfectly aligned, use your index finger and forefinger pinch both layers of fabric into a raised fold.
5) While pinching the fabric use the other hand to pass the pin through both layers.
6) Repeat 4-5 every 4-5" along the unattached side of the workpiece.
7) Thread the sewing machine and bobbin according to the machine's manual.

8) Raise the presser foot and position the workpiece under the needle. Line up the unattached side of the workpiece directly in front of the needle. Lower the presser foot to hold the workpiece in place.

9) Select the stitch type on the sewing machine. For this project I used a straight stitch (symbol pictured above). Adjust the thread tension, stitch width and length.

Note: Remove pins before they pass under the presser foot.
10) Hold the fabric flat around the needle. Gently press the the sewing machine's peddle to make the first stitches. Allow the sewing machine's feed dogs to move the fabric forward. stop after after 5 or 6 stitches.
11) Use the sewing machine's reverse functions to back stitch to the beginning. This will lock the first several stitches in place.

12) Gently press the foot peddle to continue the line of stitches along the edge of the workpiece. Gently direct the fabric so that the line of stitches remains the same distance from the edge along the whole side of the workpiece.
13) When the corner of the workpiece is reached stop stitching. Rotate the hand wheel of the sewing machine counterclockwise so that the needle is in the lowest setting.

14) While the needle is in the lowest setting, raise the presser foot and rotate the workpiece 90 degrees. Align the next side of the workpiece directly in front of the needle.

Important
Read step 15 closely.
15) Only stitch half way along this side of the workpiece. Stop half way, raise the presser foot and pull the workpiece 5"-6" forward. Lower the presser foot and complete the row of stitches.
16) At the end of the row of stitches activate the reverse function and add 5 or 6 stitches backwards.
17) Raise the presser foot and remove the work piece.
18) Trim and loose threads.

19) Use the scissors to trim the corners of the workpiece. Do not cut the threads.

20) Open the gap in the seam left on step 15. With your fingers turn the workpiece inside out so that the printed side of the fabric is on the outside.

21) Use a pen to turn out the corners of the workpiece from inside.


22) Fold over the edges of the opening in the seam and sew it shut.

23) Sew in a line of stitches about 1/8 from the edge all the way around the workpiece.

24) Optionally, add a snap button to the corners.
12) Enjoy!